In my house, we are major Marvel fans. As New Yorkers, we've got a special love for our friendly neighborhood Spider-Man. That's why I was pretty excited to hear that there's a new Spidey show premiering on Disney Junior that makes Spider-Man genuinely family-friendly.
Marvel's Spidey and His Amazing Friends follows three of your favorites ever to don the Spidey suit: Peter Parker, Miles Morales, and Gwen Stacy. The young heroes enjoy adventures together and encounter other heroes like Hulk, Black Panther, and Ms. Marvel and discover teamwork is the best way to save the day.
To get my family excited for Marvel's Spidey and His Amazing Friends, I decided to surprise everyone with their own personal web! These spider-web crafts are easy to do solo or with your kids.
Supplies:

Many of the supplies for this fun and easy craft may already be in your home. You’ll need:
- A paper plate
- Acrylic paint (Black; Optional: red, blue, pink)
- Plastic Spiders (In red, blue, and pink where available)
- Hole Punch
- Yarn
- Glue or tape
Step 1:

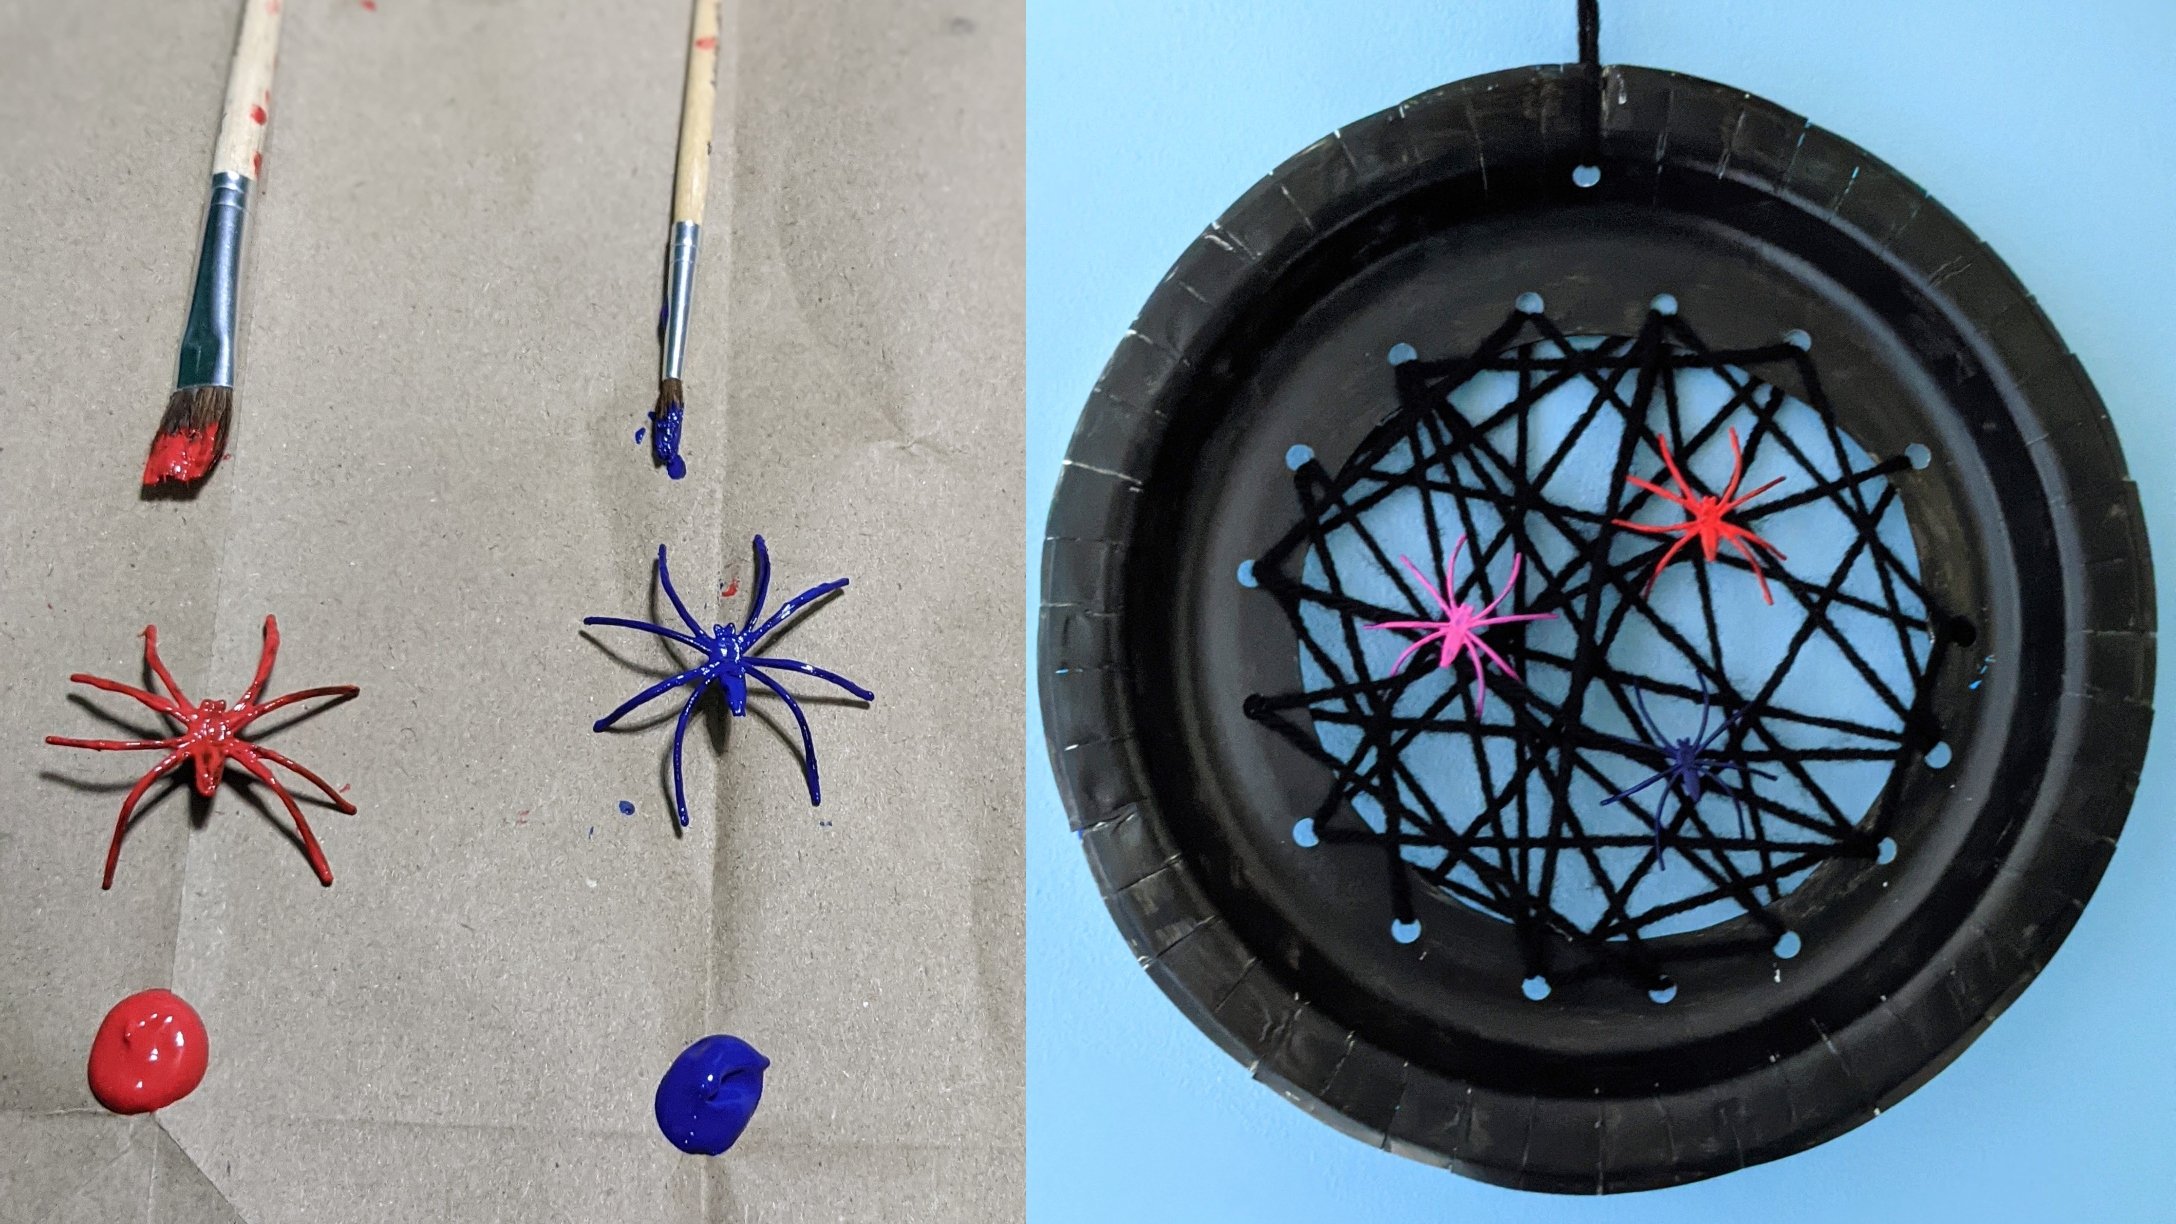
I like to get started by getting the messy stuff out of the way first, so that means painting. If you’re able to find colorful spiders, you won’t have to worry about painting yours. If you are painting them, you’ll want three spiders: Peter is red, Miles is blue, and Gwen is pink.
Step 2:

Step 3:

Before I got to paint the plate, I cut out the middle so that I wouldn’t waste paint. The easiest way to do this is to fold the plate in half, then cut.
Step 4:

Next, paint the plate black. I used metallic black paint to give it a little something extra, but any black acrylic paint will work great. Like the spiders, the plate may need more than one coat depending on the design printed on them and the coating on the plate.

Let it dry! Once it’s dry, you’ll want to punch holes around the circle you cut out. Make sure not to punch the holes too close together.
Step 5:

Punch an extra hole at the top of the plate. Cut a small piece of yarn and string it through, then knot the ends together. Now, you’ll be able to hang your web when it’s done.
Step 6:

It’s time to spin the web! Cut a length of yarn to thread through the holes on your plate. Start by making a big knot in the back of the plate so that you don’t pull the yarn through as you weave it.
Step 7:

The best thing about making a web is that there’s no wrong way to do it! Simply weave the yarn between the holes in any pattern. You’ll want to keep the yarn pulled tight but not too tight, or it will force your plate to bend.
Step 8:

When you’re done, you should have a little something like this. Knot the other end so that it’s tight and secure. You can also tape or glue the ends down on the back of the plate for extra security.
Step 9:

Next, it’s time to place your spiders! Depending on their size and weight, you may also want to consider a dab of glue to keep yours in place.
Step 10:

The finished product is adorable! The spiders really pop against the black yarn (although if your spiders want to spin colorful webs, who are we to stop them?). Allow the spiders time to dry if you’ve decided to glue them on.
Step 11:

This craft was so fun and easy. It was also a great way to get my family excited to check out Marvel's Spidey and His Amazing Friends, which premieres Friday, August 6th on Disney Junior!