My son LOVES hats. He likes to put hats on his toys. He likes to steal his dad's baseball cap. We're just waiting for/dreading the day when he realizes he can put a hat on his baby brother. His friend Rosie loves princesses. I decided to try to honor both of these passions and make the kids some cardboard crowns. With a little bit of glue, pasta, and gold spray-paint, it was easy to transform old-hat cardboard into sparkly golden crowns, perfect for parties or playtime.
Supplies:
String and/or measuring tape
Glue or hot-glue gun
Marker, pen or pencil
Scissors or box cutters
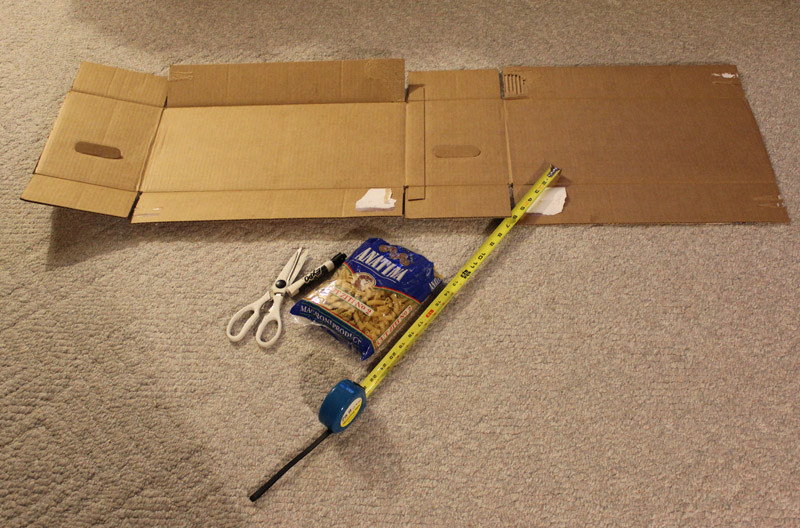
Cardboard
Gold or silver spray paint
Packing tape or ribbon
Decorations: pasta, glitter, anything you'd like to glue onto your crown…
Directions:
First of all, a word about cardboard: The heavier stock you use, the more your crowns will hold up to, say, a two-year-old boy joyfully throwing it across the room. Repeatedly. However, the heavier the cardboard the, well, heavier your crown will be. If you want a lighter hat (that's also easier for mom or dad to cut!) then use a lighter-weight cardboard, like a recycled cereal box.
Measure your child's head. Here's an old art-school trick: You don't need a measuring tape. Any soft and bendable item—like string, paper, or even the fuzzy belt from your bathrobe (hey, use what ya got!)—is good for seeing how big your child's head is. Once you know the length, mark it out on your cardboard. (I added a couple inches, knowing that I would overlap my edges and tape it closed. If you want to use ribbon to tie your crown closed, you don't want to add any extra length.)
Once you know how long your crown should be, you can go to town designing it. Mark where the middle is—this will be the front of the crown. Do you want a star, a diamond or a circle there? Maybe you want a traditional all-triangle design, all the way around? Begin your design in the center and then move outwards. They say close only counts in horse shoes and hand grenades, but I think close counts in the cardboard arts, as well. Don't worry about being perfect; just have fun with it. Draw your design as you see fit; you can use yogurt containers, recycled cans, even alphabet magnets as patterns. Or, just freehand it. Live dangerously.
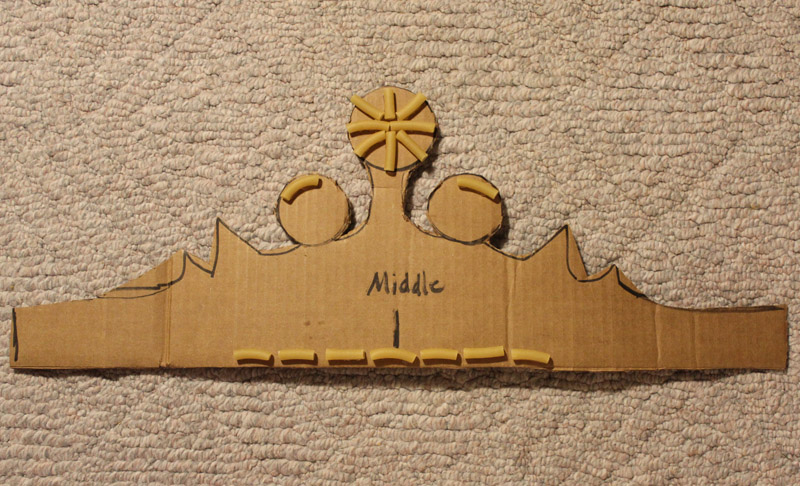
Once you have your basic design drawn, cut out your crown. Then you—and your kids—can go to town decorating it. Pasta holds spray paint remarkably well, and is easy to glue onto the cardboard. But you can use your imagination/the recycling bin and basically add anything you like to the crown base. Then take it outside, place it on your extra/remaining cardboard, and spray paint away.
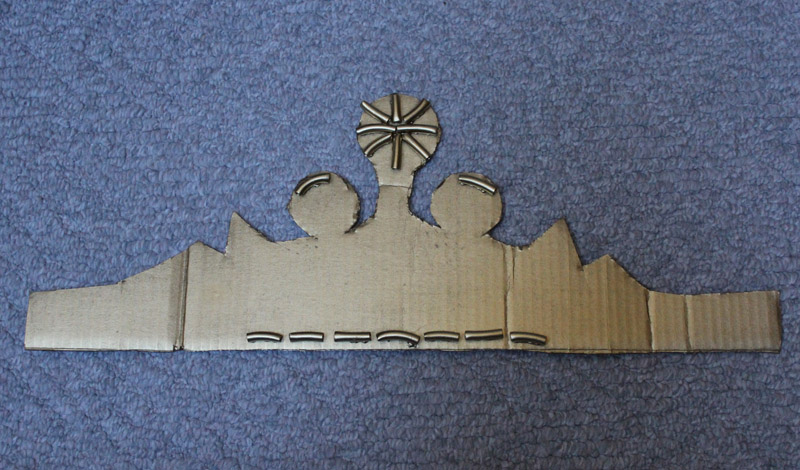
You'll want to let your crown dry per the paint's directions. When it's ready, you can either use clear packing tape to fasten the crown's ends together or you can poke holes in each end, thread ribbon through the holes, then tie it shut. After that, all you need is to present it to your child, and get ready to take pictures—or join in the fun! After all, every mom and dad deserves their own queen or king crown, too.