I used to hate cooking and baking. And having two kids means that every day I would be cooking or baking something, which means I hated a little part of my life every day. How much does that suck? But what I began to realize was that maybe it wasn't the actual cooking I hated. Maybe it had more to do with my cooking space than I realized. Between living in really small New York City apartments where I used my oven as storage (not shoe storage ala Carrie Bradshaw but close) to when we bought this house, I realized that I've lived in such poorly designed kitchen spaces that I couldn't actually say for sure if it was the process of cooking I hated or just that my space prevented me from enjoying the process. I resented having to put away the groceries, where any sort of organization would end up abandoned because there just wasn't any room. I hated all the steps to get a meal on the table because I had to always move something out of the way and I certainly hated the cleanup process, where stacks upon stacks of items would teeter precariously in a very small sink.
The thing is, though, since I do have kids and they need to eat (and that's not going to change anytime soon) we needed to tackle our kitchen renovation by eliminating any obstacles that made meal-making feel impossible.
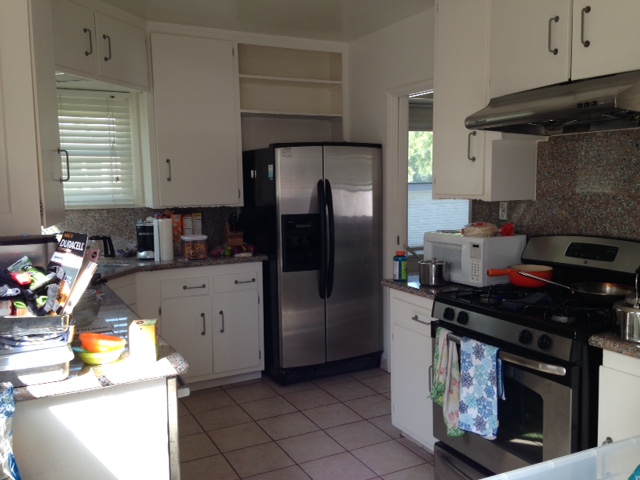
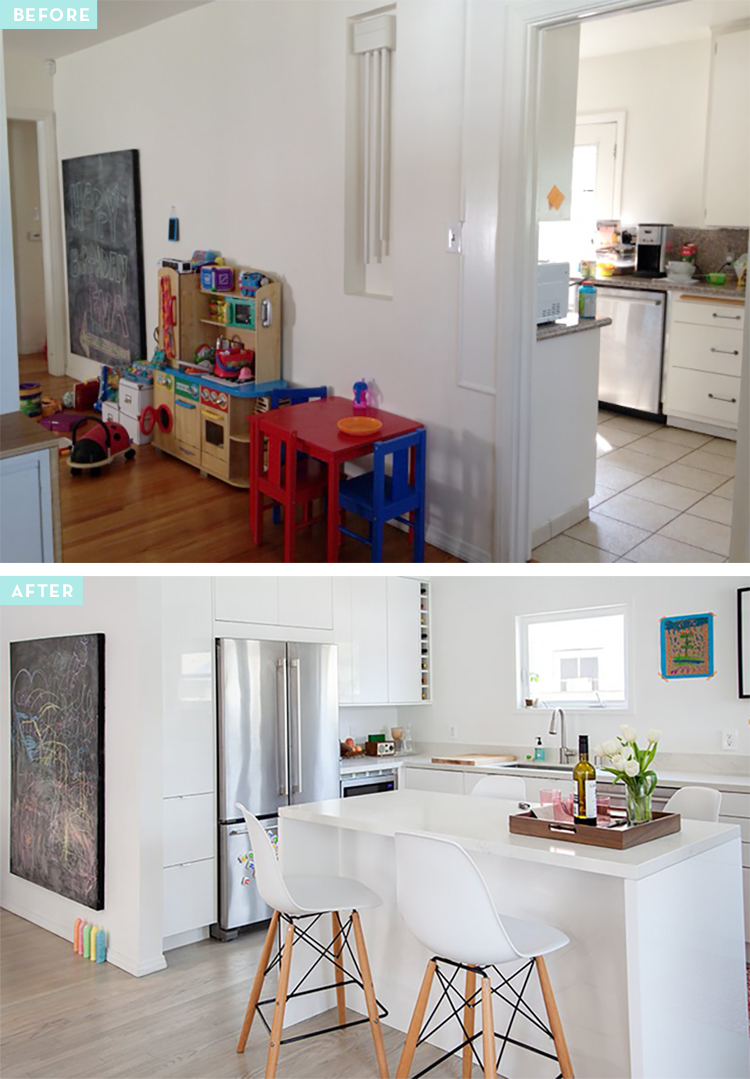
The first hurdle in the old kitchen? The lack of useable counter space. The old kitchen was broken up into three different areas with various interruptions—like a sink, a microwave or the oven—leaving only small bits of spare counter space that made any sort of prep work impossible. With the help of our architect Jennifer Yano, we designed the new kitchen to maximize countertop space, leaving ample room for meals in various stages. Now I can prepare in one area, cook in another and not feel like I have to move everything to finalize a meal. I could even start tomorrow's meal and not have to worry about it getting in the way of today's.
Since there was going to be a lot of countertop space (check out the before photos here and below), we knew we would not only have to love the look of them but choose something that could withstand the wear and tear of two little kids. We choose Caesarstone for the well-earned reputation for being able to take abuse without actually showcasing it and the fact that you can leave a bottle of red wine on the counter overnight that dripped (oops!) and still get the stain out with just a little bit of cleaner. After comparing various colorways with the subway tile, we choose one of their newest colors, Calacatta Nuvo because it felt warm like marble without all the headache that a natural stone like marble can bring.
We eschewed a traditional kitchen table for a counter-height kitchen island that allowed us more workspace if needed or a place to set out snacks and hors d'oeuvres during parties. The kids love climbing into the chairs.
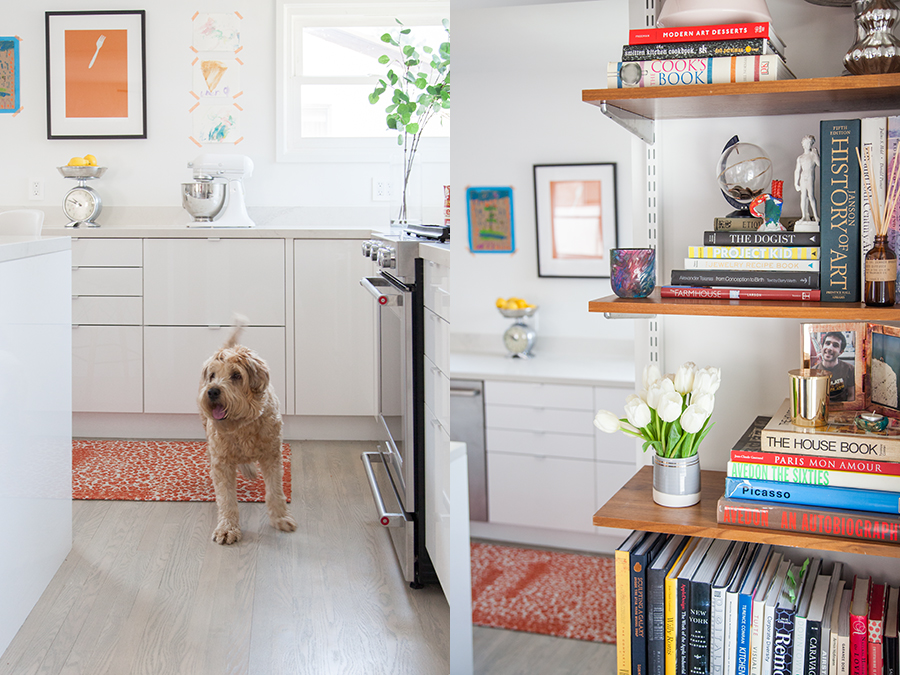
We made efficient use of the wall outside the kitchen for a bookcase that holds books for easy reference, games and knickknacks. It has the dual benefit of helping to warm up the otherwise minimal space while keeping clutter and stuff contained.
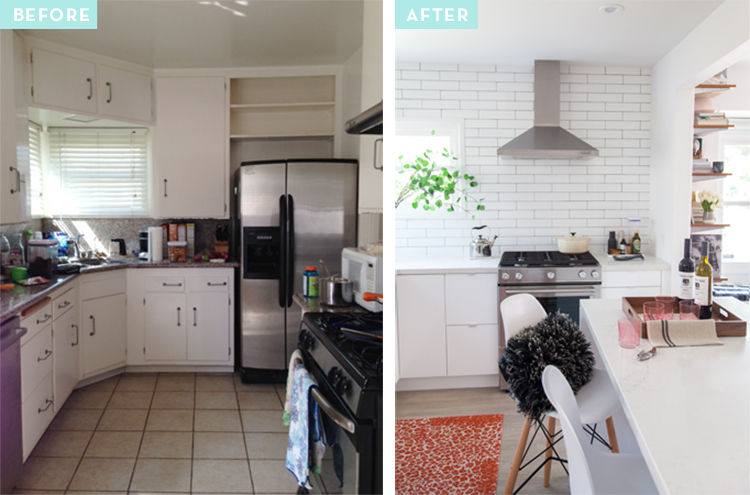
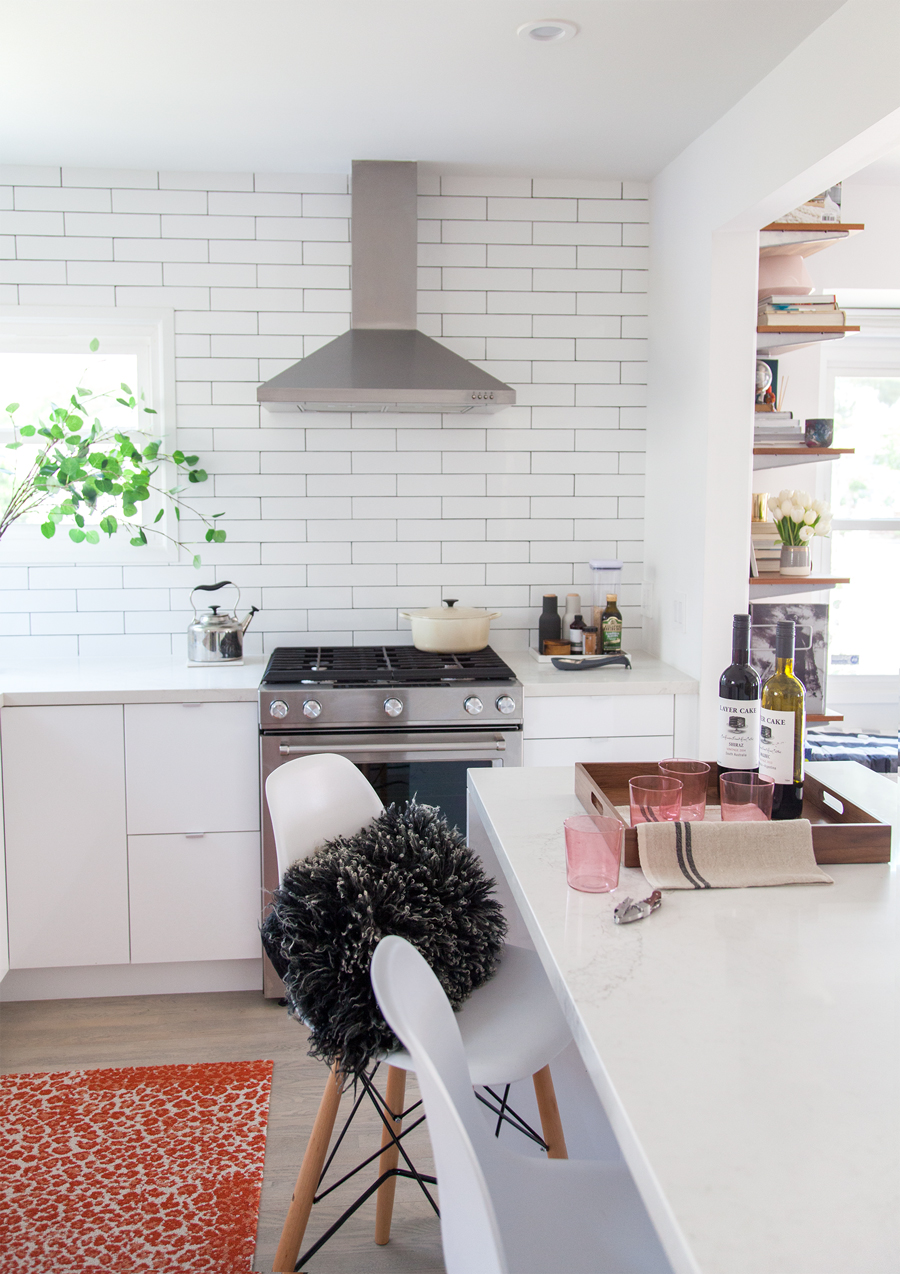
To keep the kitchen from appearing too sterile, we choose a dark gray grout to offset the oversized subway tiles. It adds a dimension to the kitchen that otherwise would have been lost with all the white walls and cabinets. It allows the wall to feel like an accent piece without demanding too much attention.
We wanted a commercial-style look for our oven and thankfully KitchenAid had just come out with this stove that has so far earned its keep. It has a convection option but what I love most is the continuous plate on top with five burner options to cook on.
Baxton Chair
Overstock
Calacatta Nuvo
Caesarstone
Bengt EK Kitchen Scale
Scandinavian Design Center
Tea Towel
Wayfair
Ceramic Tile
Home Depot
Salt & Pepper Shaker
Wayfair
KitchenAid Oven
Home Depot
Spot On
Flor
KitchenAid Mixer
Overstock
Glass Vase
Wayfair
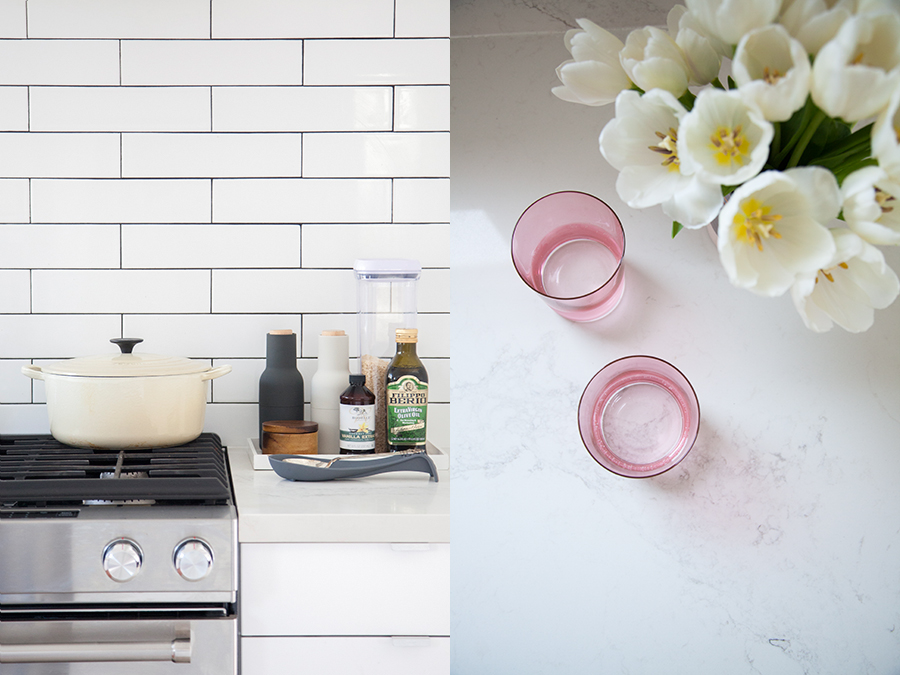
All the tools I need to cook are conveniently placed to the right of my oven. Spices and oils are handy on the countertop, while spatulas and measuring cups are all tucked neatly in the drawers.
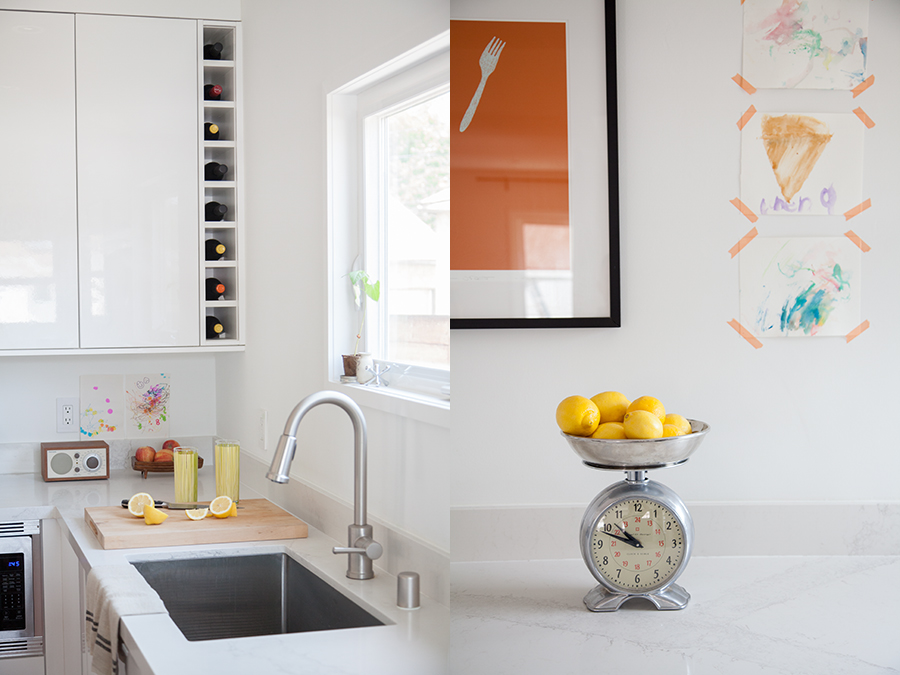
We had an awkward six inches left over on the upper cabinets, but rather fill it in with a panel, we brilliantly discovered that wine bottles would fit perfectly in the space. Voilà! Our wine collection is now always within reach.
The wall between the windows was intentionally left blank so I can hang up the kids' artwork with some easily removeable washi tape. I can now rotate their art fairly quickly, without fussing with glass frames.
The second complaint of my old space was lack of storage. The old cabinets were too tall and too narrow to contain the pots and pans and it was frustrating having all my tools spread out all over the kitchen. This made it near impossible for anyone (hint: my husband) to assist in cooking, since he could never find anything and was always asking a million questions (to the point that I would kick him out and seethe by myself, deepening the resentment of this chore). Our solution for storage may not seem obvious (where are all the upper cabinets, one may ask) but because we could plan out the space, we were able to plan for every storage need. The base cabinets are typically deep but the two corners of the kitchen have double-layer lazy susans, making use of those potentially lost spaces. All the pots and pans go into one, while all my baking supplies go in the other.
We dedicated the refrigerator wall to mostly cabinets, to make the refrigerator feel built-in and give us space for smaller items like pantry items and drinking glasses. The pull-out drawers to the left of the refrigerator are full of the kids' snacks so they can help themselves and not have to ask for help when they get hungry.
The original floor in the kitchen had layers upon layers of tile, which meant when we gutted the space, we also had to add wood floor back into the space. We didn't love the original honey-mustard stain on the floors so we decided to strip the floors, bleach and stain them all at once (go big or go home right?). The process was tedious and the bleach was so strong we were forced to leave the house and spend the night elsewhere for a couple of nights but we love the look and are happy we decided to endure that inconvenience.
To soften the room and warm up the space, I choose carpet tiles by Flor. I love the punch of orange and how it plays off the "Fork" print. In case you don't know about Flor, they are 19-inch-square carpet tiles that you can order to fit your space. We created a runner for the kitchen and like the countertop, they are pretty indestructible. The best part? If you do drip something on them, you can just pull the tile up and rinse under the kitchen sink. Once dry, simply put back in place.
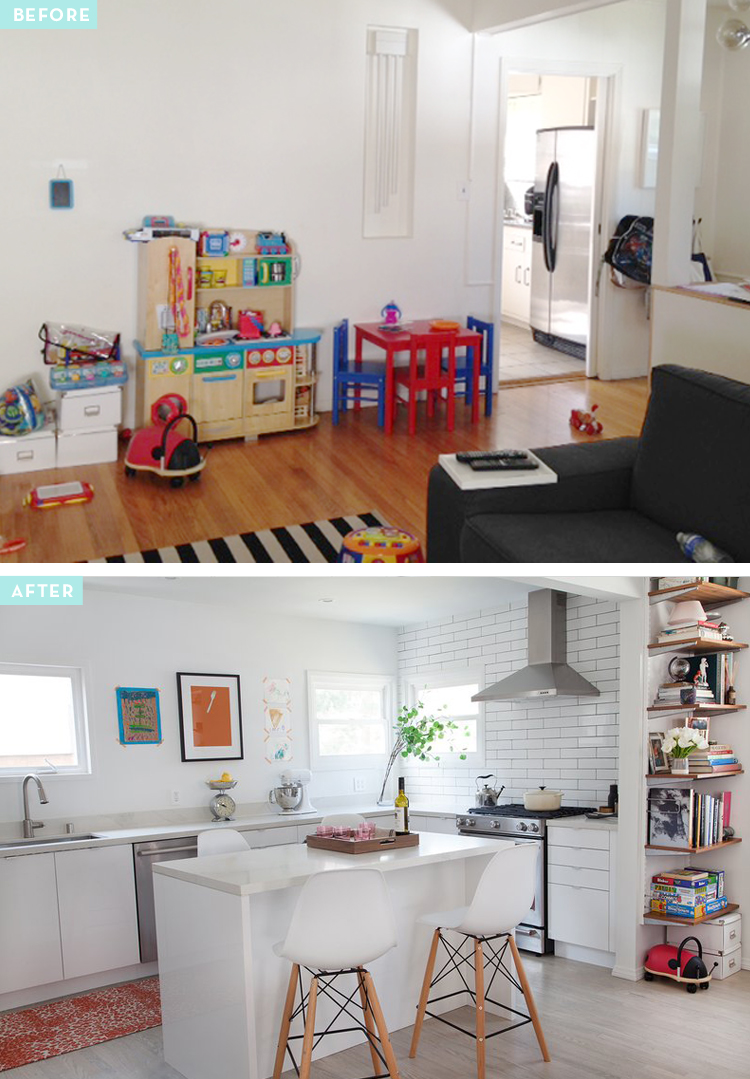
My third complaint about the original kitchen was that it felt separated from the rest of the house. Once we tore down the wall between it and the living room, the spaces became united and I no longer felt like hired help. Now I can cook, bake and prep all while being a part of my kids' lives while they play. Now, cooking doesn't feel like such a chore and the kids are more inclined to help when they see me mixing and stirring up the night's meal.
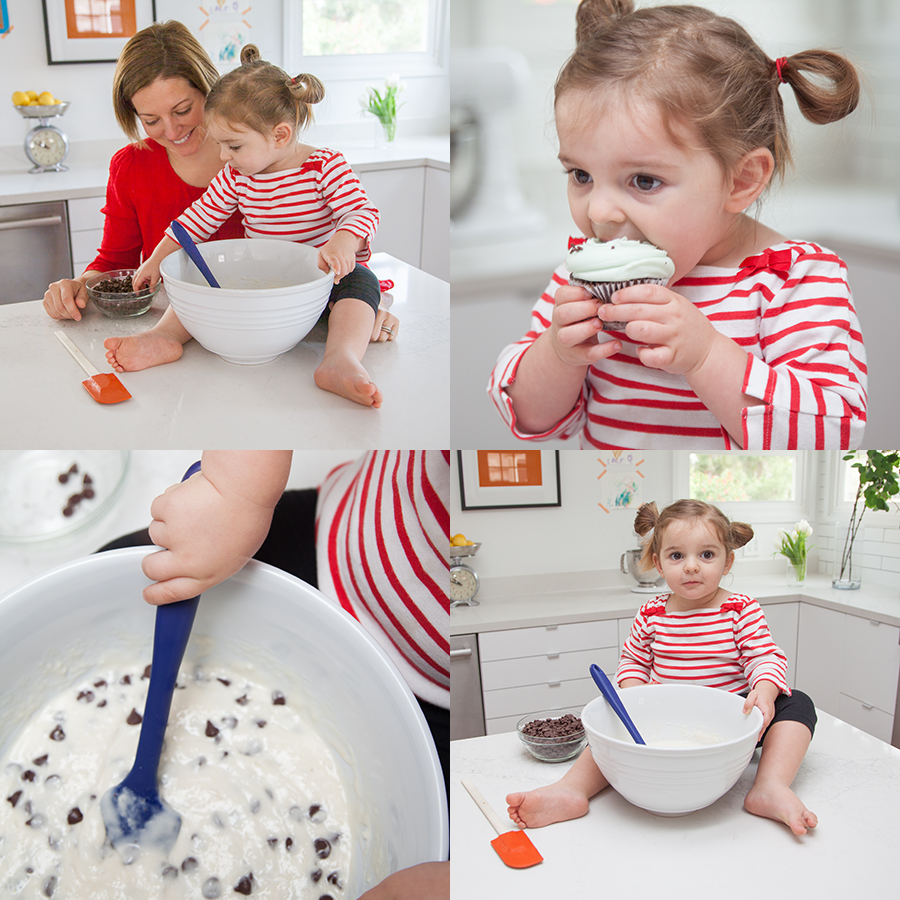
Finally, there is plenty of space for making and baking (and tasting!) cupcakes. I mean, how enjoyable is that? And with all the space for storage, I can't get enough of my uncluttered countertops—they're just some of the prettiest things I have ever seen.
Love this? Follow us on Pinterest.